Search This Blog

Mar 26, 2012

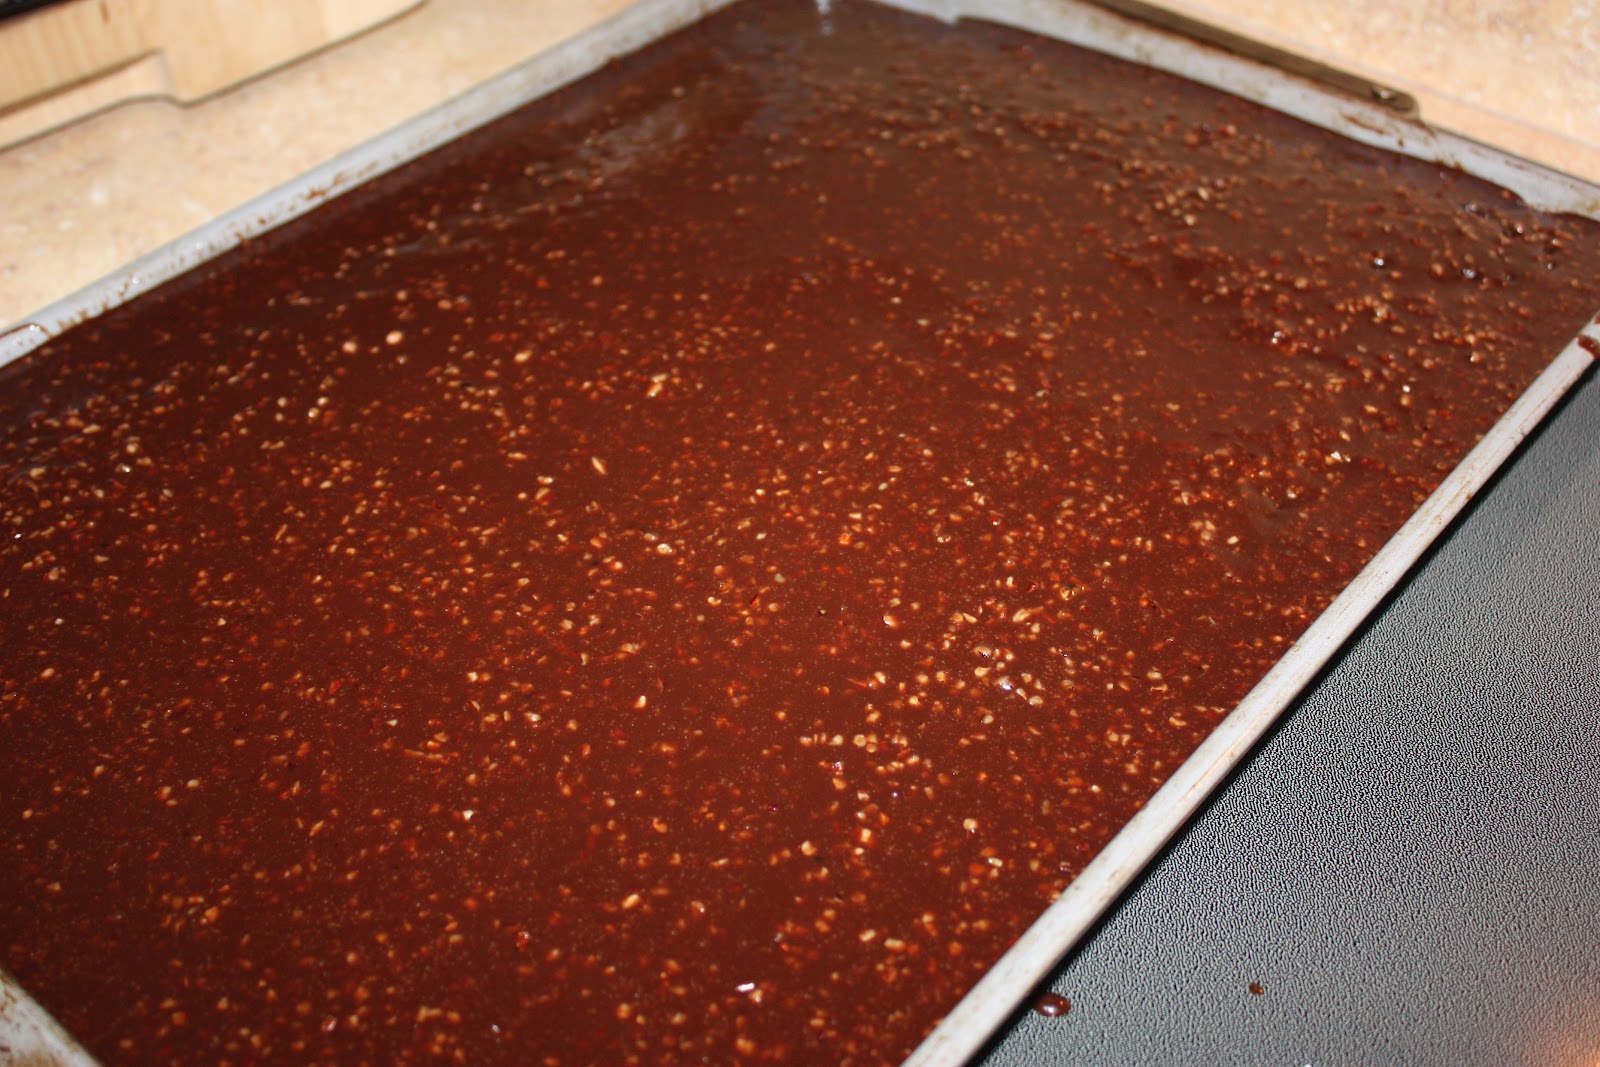
best EVER chocolate sheet cake


Warning......warning......this is the MOST DELICIOUS CHOCOLATE CAKE!
I got the recipe from the Pioneer Woman (whom I love) and I am so glad that I chose to make it, because wowzers, is it to die for!


FOR THE CAKE:
 2 cups Flour
2 cups Sugar
1/4 teaspoon Salt
4 Tablespoons (heaping) Cocoa
2 sticks Butter
1 cup Boiling Water
1/2 cup Buttermilk
2 whole Beaten Eggs
1 teaspoon Baking Soda
1 teaspoon Vanilla

FOR FROSTING:
1/2 cup Finely Chopped Pecans
1-3/4 stick Butter
4 Tablespoons (heaping) Cocoa
6 Tablespoons Milk
1 teaspoon Vanilla
1 pound (minus 1/2 Cup) Powdered Sugar

Preparation Instructions
 I used an 18x13 sheet cake pan.
In a mixing bowl, combine flour, sugar, and salt.
In a saucepan, melt butter. Add cocoa. Stir together.
Add boiling water, allow mixture to boil for 30 seconds, then turn off heat. Pour over flour mixture, and stir lightly to cool.


In a measuring cup, pour the buttermilk and add beaten eggs, baking soda, and vanilla. Stir buttermilk mixture into butter/chocolate mixture. Pour into sheet cake pan and bake at 350-degrees for 20 minutes.
 

While cake is baking, make the icing. 
Chop pecans finely or buy them already finely chopped (that's what I did!)
Melt butter in a saucepan.
 Add cocoa, stir to combine, then turn off heat. Add the milk, vanilla, and powdered sugar.
 Stir together. Add the pecans, stir together, and pour over warm cake.

Cut into squares, eat, and totally wig out over the fact that you’ve just made the best chocolate sheet cake. Ever.


 Source: The Pioneer Woman

Fabulous Blueberry Pie

So I always have trouble with rolling my pie crust's out. They are NEVER big enough to fit in the pan. Well, let me say that I finally did it! I used this recipe for the crust, Pate Brisee from Martha Stewart. If you don't want to make a crust, then just feel free to get the store bought ones. 
Anyway, so I made a yummy Blueberry Pie! It was definitely the best one I've ever made!

 
Fabulous Blueberry Pie

To make this you will need (these ingredients are JUST for the pie, not the crust)
flour, for dusting
2 pounds (about 7 cups) fresh blueberries, picked over and rinsed
1/2 cup sugar
1/4 cup cornstarch
1/4 tsp ground cinnamon
1 Tbsp fresh lemon juice
1 large egg yolk, for egg wash
1 Tbsp heavy cream, for egg wash
fine sanding sugar, for sprinkling

To make:
Preheat oven to 400 F
On a lightly floured surface, roll out 1 dish of dough to a 13" round, about 1/8 " thick. Fit dough into a 9" pie plate.

*look at all that beautiful crust overhand, ah yea......It makes me so proud!*


In a large bowl, toss together blueberries, sugar, cornstarch, cinnamon, and lemon juice until well combined. Pour mixture into pie plate, piling in center.

On a lightly floured surface, roll out remaining disk of dough.  Then place on top of pie filling and trim dough to a 1" overhang. Fold edges over and crimp with a fork.

In a small bowl, whisk together egg yolk and cream for egg wash. Brush on top of dough and edge of pie shell. Generously sprinkle with sanding sugar.
Refrigerate or freeze entire pie for 30 minutes.

Transfer pie plate to a parchment lined rimmed baking sheet and bake until crust begin to brown, about 20 minutes.
Reduce heat to 350 F and continue baking until crust is deep brown and juices bubble, about 55 minutes. (If crust browns too quickly, then tent the pie with foil or cover edges with foil or use one of these cool pie crust shields, found here).

Transfer to a wire rack and let cool at least 3 hours. 

Feb 20, 2012

Chicken Alfredo Roll Ups

This recipe was such a hit! It calls for homemade alfredo sauce which I HIGHLY recommend. It makes ALL the difference! This was such a different, fun, DELICIOUS meal that we will definitely be eating more of! It's what I call, "this tastes like we're at a restaurant" meal!
The only thing I changed, was that I couldn't fit all 9 lasagna noodles in my 8X8 pan, so instead I just used 6.
Also, I used a rotisserie chicken from the store and just shredded it.


To make:

9 lasagna noodles

2 ½ cups alfredo sauce (optional homemade recipe below)
2 cups cooked, shredded chicken
oregano
garlic salt
3 cups shredded Mozzarella, or cheese of your choice


Spray an 8x8 pan with non-stick spray and pour ½ cup alfredo sauce, or just enough to cover the bottom of the pan.

Boil 8-10 cups water in a large pan, cook lasagne noodles until al dente. (I usually cook 1 or 2 extra just because lasagna noodles always seem to break on me when I am stirring them.)

Now this is the important part! Drain and rinse the noodles with cold water to prevent them from sticking to each other. Then, lay out each noodle individually and blot dry with a paper towel.

Spread about 2 Tbs. alfredo sauce over each noodle. (if there is too much sauce you will have a big mess on your hands!) Sprinkle oregano and garlic salt on top of sauce. Take 1/9 of the shredded chicken and spread it out evenly over each noodle. Add approx. 3 Tbs. cheese. 

To roll up, start at one end and roll the noodle over the toppings. You will need to lift the noodle a little to prevent squishing out the inside ingredients while rolling.


Place the roll-ups in the pan, one by one, seam-side down so they don't come undone. Once they are all in the pan, pour the remaining alfredo sauce over the top. Top with remaining cheese. Bake at 350 degrees for about 30 minutes, or until the cheese is completely melted on top.


The Best Garlic Alfredo Sauce


½ cup butter
2 ounces cream cheese
2 cups heavy cream (or substitute half and half)
2 teaspoon garlic powder
½  tsp. fresh minced garlic
salt and freshly ground black pepper
½ tsp dried oregano
⅔ cup parmesan cheese

In a medium to large saucepan melt the butter over medium heat. Add fresh minced garlic and cook for 1 minute, or until fragrant. Add the cream cheese and whisk to smooth and melted. Whisk in the heavy cream.
Season with the garlic powder, salt and pepper. Bring to a simmer and whisk frequently until sauce thickens, around 15 minutes. Stir in the cheese and when melted, remove from heat and serve.


Source: http://mmmcafe.blogspot.com

Feb 12, 2012

Cherry Chocolate Kiss Cookies

Cherry Chocolate Kiss Cookies
These are the PERFECT cookie to make for Valentine's Day that is just around the corner!

·                  1 cup of softened unsalted butter
·                  1 cup of powdered sugar
·                  1 tbsp maraschino cherry juice
·                  3/4 tsp vanilla extract
·                  2-3 drops of red food dye (optional)
·                  2 1/4 cups of flour
·                  1/8 tsp salt
·                  1/2 cup of maraschino cherries, chopped up
·                  White sugar, to roll the cookies in
·                  36 chocolate kisses

Beat the butter with a mixer until creamy and smooth. Add the powdered sugar, maraschino cherry juice, vanilla extract, and red food dye (if using); beat with a mixer until smooth. Mix the flour and salt together then pour in batches into the dough. Mix with the beater, making sure to wipe the sides of the bowl with a rubber spatula. Add the cherries and mix well with spoon. Place the dough into the refrigerator for 15-30 minutes.

Preheat the oven to 325 degrees. Line a baking sheet with a silpat mat.

Roll the cookie dough into small balls then drop into a bowl of sugar; roll to coat evenly. Place the balls on the cookie sheet about 2 inches apart; press your thumb down in the center of the cookie gently. Repeat.

Place into the oven and bake for 13-14 minutes. Remove them from the oven and immediately place a kiss in the center of each cookie. Let them set up on the baking sheet for 3-5 minutes before moving them to a wire rack to cool.

Jan 16, 2012

Dynasty corn pudding

I am always on the hunt for a great corn pudding recipe and I found one in the November 27, 2011 edition of Parade Magazine. The recipe is for Dynasty Corn Pudding and comes from Linda Evans and her new book, Recipes for Life. 

To make this Dynasty Corn Pudding you will need:
1 stick butter, melted plus more for greasing
3 cups fresh corn kernels (or frozen)
2 eggs
1 cup sour cream
9 oz monterey jack or pepperjack cheese, cut into 1/2 inch cubes
1/2 cup cornmeal
1 (4 oz) can chopped green chiles
1/2 tsp salt
1/2 cup grated parmesan or parmigiano-reggiano cheese

To make:
Preheat oven to 350 degrees F.
Generously butter a 2 quart rectangular casserole dish.
In a blender or food processor, puree 1 cup corn kernels with melted butter and eggs.

In a large bowl, combine all remaining ingredients except parmesan cheese. 
Add pureed corn and mix well.
Pour into casserole dish and sprinkle with parmesan,
bake for 30 minutes.


Tip: If the top isn't browned, but the pudding looks set, then place it under a preheated broiler for a couple of minutes. But be careful so it doesn't burn!


Jan 11, 2012

Baked Parmesan Garlic Fries


Baked Parmesan Garlic Fries
All I have to say is WOW!
I made these to go along with dinner and were they ever delicious. Definitely added them into the repertoire!

Ingredients:
2 russet potato's
salt & pepper
garlic powder
parmesan cheese
panko bread crumbs
extra virgin olive oil
Directions:
1. Slice potatoes into 1/4″ slices (the thinner you slice, the crispier they’ll be!) and soak in water for at least 1 hour, and up to 8 hours.
2. Preheat oven to 450 degrees. Drain potatoes and pat dry with a kitchen towel. Add the slices to a large bowl and season to taste with salt, pepper, garlic powder, parmesan cheese and panko bread crumbs. Drizzle in extra virgin olive oil, toss to coat the potato slices in all the seasonings and bread crumbs, then lay the potato slices in a single layer on a non-stick sprayed baking sheet.
3. Bake for 20-30 minutes, flipping halfway through, until potatoes are golden brown and cooked through.
Source: Babble.com

Chili Con Carne

I found this recipe in Parents magazine and it looked so delish, so I figured I'd give it a shot.
It is the perfect dish to make on a cold wintry day.

You will need:
1 Tbsp EVOO
1 lb. lean ground beef
1/2 cup chopped onion
1/4 tsp fresh ground pepper
1 Tbsp minced garlic
1 Tbsp chili powder
1 tsp ground cumin
1/2 tsp dried oregano
1-15 oz. can pinto beans, rinsed and drained
1-15 oz. kidney beans, rinsed and drained
1-14.5 oz. can diced tomatoes (undrained)
crushed tortilla chips
chopped fresh cilantro (optional)
shredded cheddar cheese

To make:
Put oil in a large pot over medium heat.
When it's hot, add beef, onion, and pepper.
Cook and stir until meat has lost its pink color and onion is soft; drain off fat.
Stir in garlic, chili powder, cumin, oregano and cook for 1 minute more.
Add beans and tomatoes.
Bring to a boil, then reduce temperature and cook, covered, stirring occasionally, until the tomatoes have begun to break down and the flavors have melded, about 15 minutes.
Serve with chips and garnish with cheese and cilantro (optional).
Makes 4-6 servings.

Source: November 2011 Parents Magazine

Jan 10, 2012

Braided Spaghetti Bread


Braided Spaghetti Bread
I found this recipe on Pinterest and knew right away that I HAD to try it.
Boy am I glad that I did.....it was sooo good!
I mean who doesn't love the combo of spaghetti and bread? Mix up a little Caesar Salad and you're good to go!

1 Loaf Rhodes Bread Dough or 12 Rhodes Dinner Rolls, thawed to room temperature
6 oz spaghetti, cooked
1 cup thick spaghetti sauce
8 oz mozzarella cheese, cut into 1/2 –inch cubes
1 egg white
Parmesan cheese
Parsley flakes


To make:
Spray counter lightly with non-stick cooking spray.
Roll loaf or combined dinner rolls into a 12x16-inch rectangle.
Cover with plastic wrap and let rest 10-15 minutes.
Cook spaghetti according to package instructions.
Drain and let cool slightly. Remove wrap from dough.
Place spaghetti lengthwise in a 4-inch strip down center of dough.
Top with sauce and cheese cubes.
 Make cuts 1 1/2-inches apart on long sides of dough to within 1/2-inch of filling.
Begin braid by folding top and bottom strips toward filling.
Then braid strips left over right, right over left.
Finish by pulling last strip over and tucking under braid.

Lift braid with both hands and place on a large, sprayed baking sheet.
Brush with egg white and sprinkle with Parmesan cheese and parsley.
 Bake at 350°F 30-35 minutes or until golden brown. Cool slightly & serve.

Source: Rhodes Bread.com

Jan 2, 2012

Gingerbread Raspberry Snowflake Tart

Gingerbread Raspberry Snowflake Tart

I found this recipe for a gingerbread tart and it was really different because you make it with a gingerbread crust. It gets nice and brown when you bake it, but it's not burnt, it just cooks that way because of the gingerbread. If you are a fan of raspberry and gingerbread, then you will love this.

To make:
2 1/4 cups flour, + more
1 1/2 tsp baking powder
1 tsp ground ginger
1 tsp ground cinnamon
1/2 tsp ground cloves
1/4 tsp pepper
1/2 tsp salt
1/2 cup dark brown sugar
1/2 cup (1 stick) butter, room temp.
1/3 cup unsulfured molasses
2 egg yolks, plus 1 egg white
1 1/4 cup raspberry jam

To make:
Sift flour, baking powder, ginger, cinnamon, cloves, pepper, and salt in a bowl of electric mixer. Add sugar; mix on med-low speed until combined.
Add butter; mix until combined, about 2 minutes.
Add molasses and egg yolks; mix until dough just comes together, 30 seconds.

On a lightly floured surface, roll out 2/3's of dough to a 12" round, 1/4" thick. 
Fit into a 10" tart pan with a removable bottom.


Spread jam over shell; refrigerate 30 minutes.

Roll out remaining dough between lightly floured pieces of parchment paper to a 10" round, 1/4" thick. Transfer round and parchment to a baking sheet and refrigerate or freeze for 30 minutes.
From round, cut out dot shapes with metal pastry tips, and snowflake shapes with cookie cutters. Refrigerate round on baking sheet until firm, 30 minutes.

Lightly beat egg white; brush rim of tart shell.
Carefully slide dough round over shell; press edges to adhere.
Refrigerate or freeze until firm, 30 minutes.

Preheat oven to 375 degrees F and transfer tart to a rimmed baking sheet. Bake until crust is golden brown, about 50 minutes to an hour.
Let cool completely on wire rack.


Jan 1, 2012

Rootbeer Reindeer's


For Neighbor gifts this year we made up these adorable Rootbeer Reindeer!
My son loved helping out and it was super easy (and cute) to make!
The holidays are over, but you can always make these next year!